Frame by Frame: OPTA Videos, Part 1 — Planning & Prep
(This is part one of a three-part series covering video production for an elearning project. Part 2 covers production, aka “shooting”, and Part 3 covers post-production editing and publishing.)
VCC’s OPTA program trains students for careers as Occupational and Physical Therapist Assistants. The training provided by the OPTA program blends online activities with in-class and onsite practical skills. It’s a highly visual and hands-on profession.
OPTA Department Head Carmen Kimoto and her instructors had gathered feedback from course evaluations and student focus groups that showed a real need to augment learning using videos of muscle functions and practical skills. Their Students had told them that they wanted video content in their courses, so the team decided to develop videos to give their students the kind of three-dimensional, spatial, and kinetic information that illustrations or diagrams just couldn’t provide.
Carmen and one of her instructors approached us to ask for advice in creating a series of instructional videos. In the past, their faculty had shot video sequences using mobile devices, but now they wanted to make a new series of higher-quality videos that could better address their students’ needs.
Our centre has often been involved in video production for academic events at VCC, whether recording guest speakers for CTLR’s “Lunch and Learn” workshop series, or being invited into classrooms to document individual instructor lessons and demonstrations. Over the years, we’ve assembled a mobile collection of consumer/prosumer-grade video gear suited to capturing teaching situations wherever they occur on-campus.
For OPTA’s video projects, I assured Carmen that our centre had the necessary video equipment and experience to help them plan, shoot, and edit their videos. If they wanted, I was also ready to train them in the production steps we’d be taking while we worked together, so that there would be some knowledge transfer to guide them when planning or shooting future videos. Having in-house technical resources near-at-hand allowed Carmen and her team to focus their time and limited budget on developing their content and adapting their demonstrations for the camera.
High-level Goals: Time, Quantity, Quality
The three classic stages we’d organize their video projects around would be Pre-production (paper planning), Production (shooting and recording), and Post-production (editing and distribution).

We started working out a list of high-level goals and completion dates: this was all about understanding the size and scope of their video project. They needed to create twenty videos of three to five minutes each, which gave me a ballpark idea of how many minutes of finished video would be required. From there, I could start scoping-out how many hours of work we might be facing.
To shoot the actual scenes, the OPTA team suggested using a large lab room where they’d demonstrated to students in the past. They sent me photos of their room and equipment, and we did a walk-through tour of the large room to see how much space there was to move around and where the brightest windows and electrical outlets were located. The space was ideal in that it had floor-to-ceiling windows that let in a lot of natural light. (If I can shoot using natural light without setting up a lighting kit, I always will. It just makes everything so much faster and easier to manage.)
Finding the scope of work
The OPTA team wanted to know how many videos could be recorded in a day, so they could plan their staff schedules and know when to book the room. It helped to introduce them to the idea of a “shooting ratio”.
Back in the late 1980s and early ’90s, I took part in two educational TV series for BC’s Knowledge Network. In one project I was part of an onscreen art class, and in another project I was a behind-the-scenes computer animator. I learned from our Director that for each 10 hour shooting day, his team could produce one hour of finished video for broadcast. In that project, each one hour finished episode would take ten hours to shoot, so that series was working with a shooting ratio of about ten to one (10:1). (In fact, it may have been more like 15 to one, as scenes had to be re-shot and added to each episode.)
The shooting ratio is just a starting point to help you scope-out the amount of work and time that will be needed. Using a shooting ratio of 10:1 on the OPTA project, I could make an educated guess as to how many video shots might be completed in a four hour shooting session. This helped the team decide how many shooting sessions might be needed overall, so they could schedule the lab as a shooting space and to arrange for additional staff to help. We came up with a thumbnail estimate that the 59 minutes of finished video we’d need to create might take us eight to ten hours to shoot overall. (This didn’t include time needed for reshoots, or for post-production things like editing and titling — just in-studio shooting of the raw material.)
Sketching out the “What” of it all
Early in our first few discussions, I introduced the idea of scripts and storyboards. The SMEs in OPTA knew exactly what content they wanted to cover and the order of the videos they’d need, according to their course guidelines and teaching experience. But each video would still need to be broken down into separate scenes to determine what kinds of camera shots might be best, or if spoken narration or text overlays would be needed. A sequence showing the anatomy of the head and shoulders might not be possible in a single shot; you might want to use multiple shots looking at different parts, and maybe a close-up or two. All of this could be specified before-hand on paper, in a simple and rough way.
Carmen, Kristen, and I worked out a sequence of shots and numbered each shot for easy reference. Often, a storyboard helps to visually describe the shots of a scene, using little sketches. For example, when the camera needs to be far away to capture some broad context, or closer to show more detail (see below).
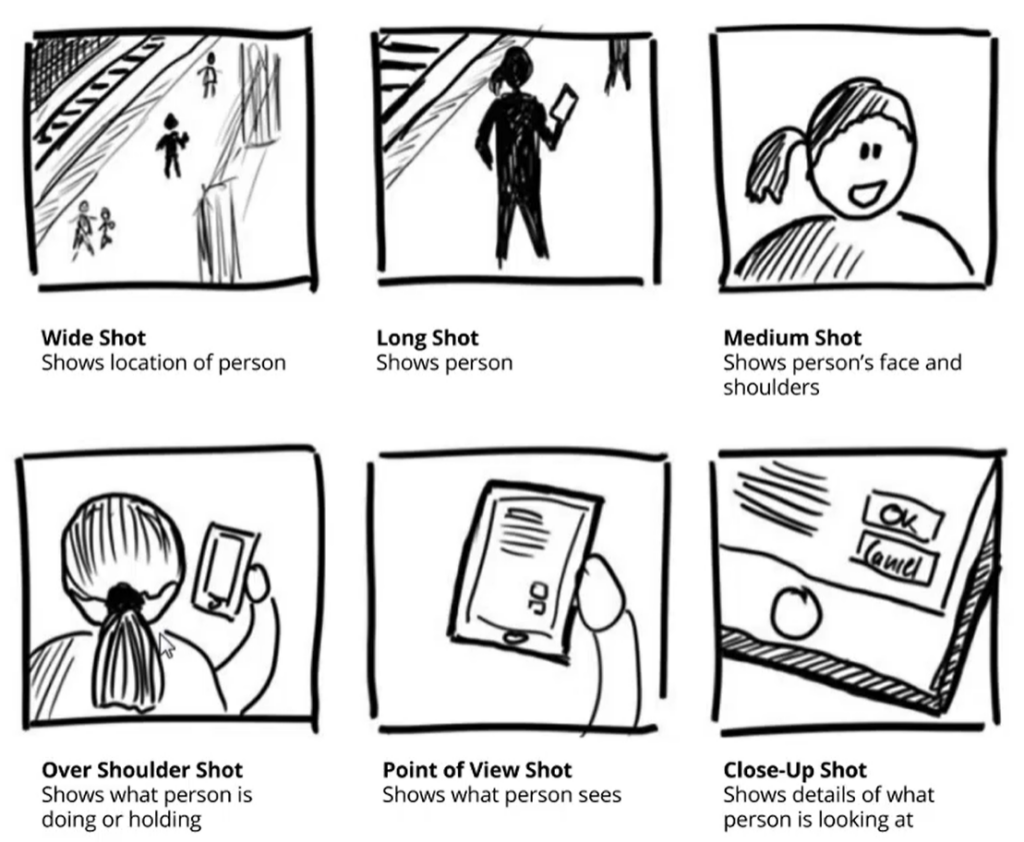
Since many of the shots OPTA needed would show a posed figure from the same orientation, we realized that it was faster and easier to describe shots using text, and no images (“medium shot, facing right”, “CU of arm”).
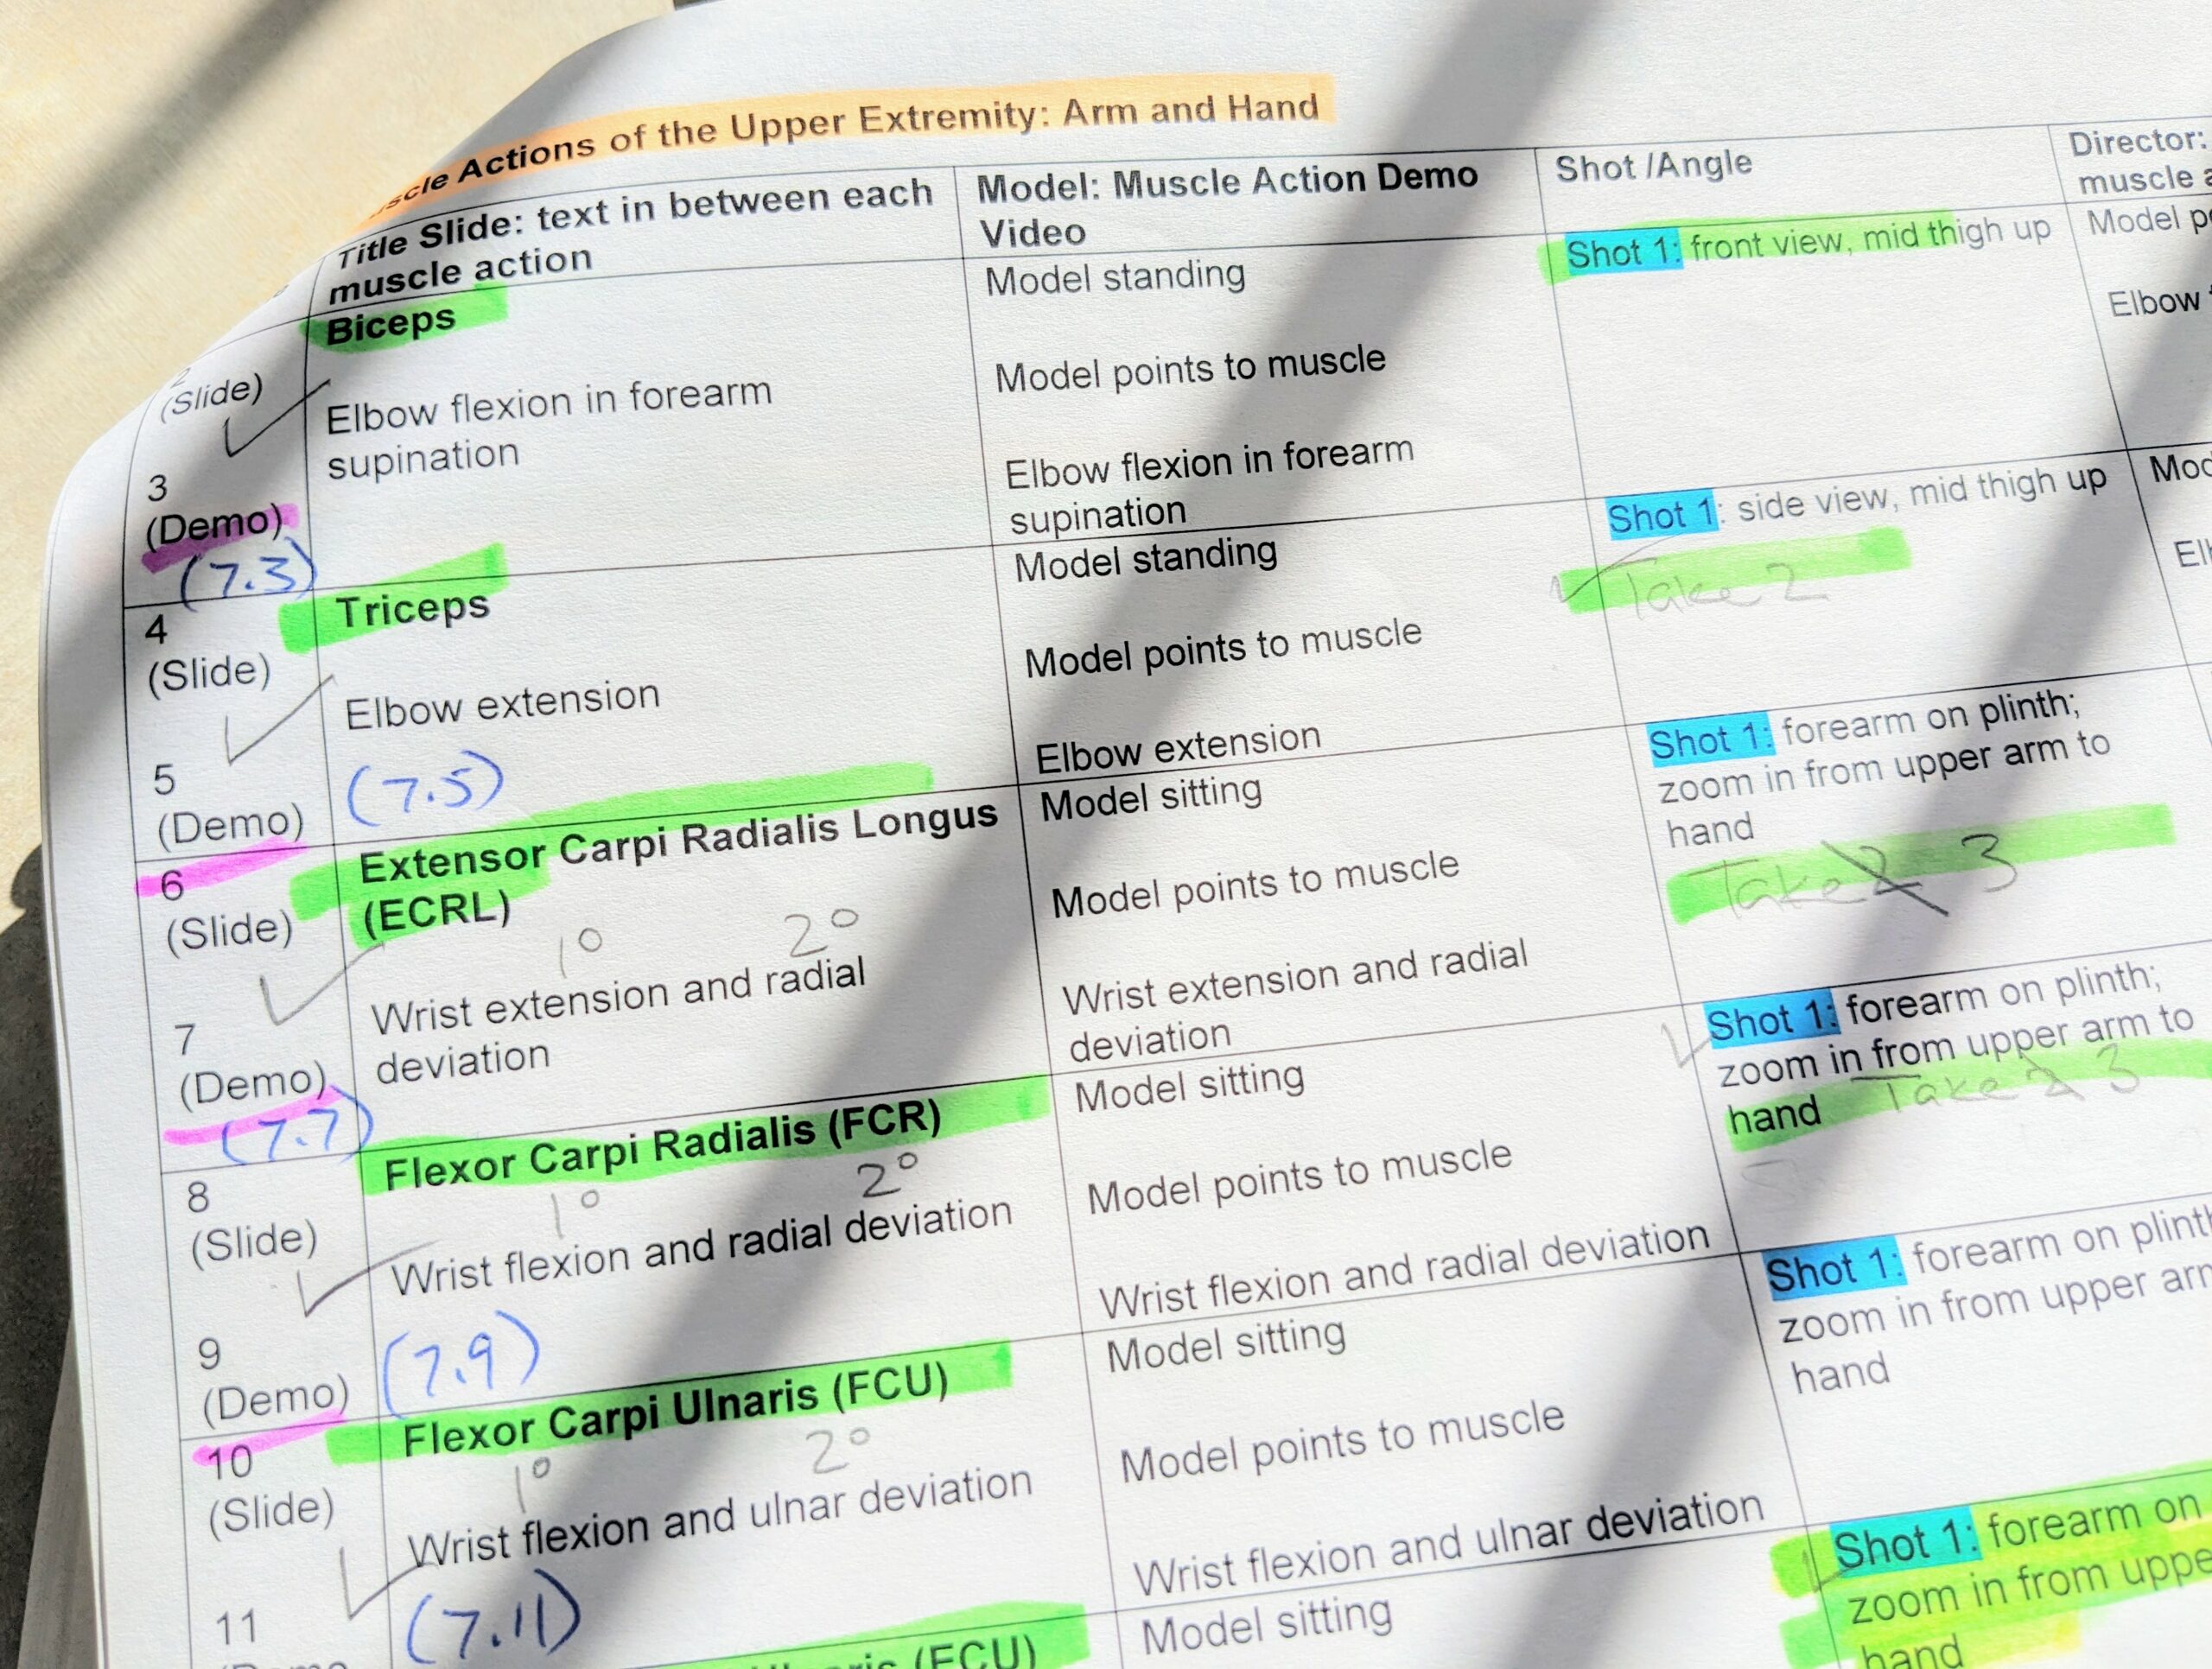
The guiding document for the OPTA shoot evolved into a series of boxes without drawings, but with important written descriptions and lots of room for hand-written notes. It became our main shot list, used by the “floor director” to call out which shot would be recorded next, and to tick-off completed shots or scribble in minor notes for later action. (Who was our floor director you ask? We’ll get to that next.)
With all the shots spec’d out on paper, and people and a shooting space reserved, the next step would be to start shooting footage…